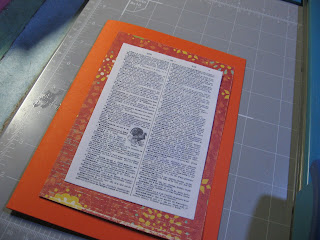
I visited some dear friends over the thanksgiving weekend and i thought i would send some simple handmade thank you notes. One couple invited us to dinner and to stay with them for the weekend. Another couple hosted a casual party for us Friday night. And another dear friend gave us all little gifts. (more on that later!)

For ideas i flipped through a vintage Larousse illustrated dictionary and found this little bird.

I already had some nice orange card stock folded into a journal that i never used - but it was a bit too big for the envelopes.

Here's how to decide how big to make the cards - i measured the envelopes! They were about 7 1/4 by 5 1/4.

This is my favorite precision cutter - just the right size for this type of project. Keeping the cardstock folded, i cut along the long edge so that it was 5 inches wide.

Then i cut the short end so that the card was 7 inches tall.

A perfect fit!

I scanned the page from the dictionary with the dinde, (turkey in French) and printed it out 4 to a page. My HP printer program asks me if i want to print any image one, two, three, 4 or 9 to a page. Otherwise i would not know how to do this!

The dictionary paper was a little to small and lonely on the card. I tried a few scenarios and decided to make a simple frame.

To get the perfect measurement - i looked at the card and the dictionary page, lining them up on the edge of the paper cutter. One was 5 by 7 the other was 3 by 5 - so the frame should be cut to 4 by 6.

Perfect!
 This scrapbook paper had a preprinted rough edge all around. But since i cut it into peices- i only had one "rough" edge left. So to make all sides "match" - i used a bit of sanding square to rub off a bit of the colour.
Here you can see how much better it looks when all edges have that faded effect.

Here it is all glued together. I used my fav UHU glue stick.

I wanted a little something something to add to the card. I tried and rejected buttons, ribbon and stickers. Instead I added a single skeleton leaf to the front of each card with two tiny glue dots. Put them right on the stem or you risk tearing the leaf.

So sweet and simple - i call this perfect symmetry - like a matted picture in a frame.

So the gift i received from Mary was a calligraphy pen and violette ink - scented as well as coloured purple. I totally suck at calligraphy - but i thought it would be rude not to try. Here's a tip - write on a separate piece of paper - NOT directly on the card. That way you can make MANY mistakes and just save the best one.

Here are the three cards. I added a little autumnal fruity sticker to the inside of the card - to hold the sentiment in place. Off they go into the mail!
Now, what will i do for christmas cards...hmmmm....?
No comments:
Post a Comment