Monday, February 24, 2014

Beeswax and Acrylic

 Our friend S. went to a workshop last year with the artist Crystal Neubauer - where they created collage on the back of acrylic panels, using melted encuastic wax.  We tried to recreate the process with plain old melted beeswax.  I purchased a dozen acrylic panels at TAP plastics - a west coast retailer for all things plastic.  They were so nice. We chose mainly 1/8 inch thick - which is quite reasonable - but you can get thicker if you want.
The piece above was 11 x 14" on 3/8".
 We started by peeling off the white backing from paper napkins.  I then cut out a bunch of birds.  I created a collage withy birds, nests, cages and flowers.  then layered on some sheet music (from a napkin).  then one large dinner napkin fit perfectly as the background for this 12" square panel.
 Same process here - i worked very symmetrical.  You have to work backwards - ie on the BACK of the acrylic.  So you lay down first want to want to show the most.  Kind of the opposite of traditional collage.  You use melted wax to apply the napkins, and a heat gun or quilt iron to smooth it out and remove the excess.
 
Here are some of the art created by my friends:
 Here is a riot of pink flowers.
 More pink flowers with a sheet music background.
And here are some yellow flowers with a bamboo patterned background.  The pieces look lovely in front of a window - where the light can shine through.  But you don't want to put them in too sunny an exposure - or they might melt!

Altered Book Swap 2014 - Green

This month i had Z's beautiful altered book to work in for our 2014 round robin swap. The title of the book is Nature and Other Green Things.  She cut a whole in the front of a 1920's era children's book with a Dremel tool, to insert a wood, clay and resin piece she made at a Create workshop last year.  She used a gold bracelet to create an arc around the sun, with rays of light and green beads, all encased in more resin.
 For my first spread i was inspired by the graphics at the Sochi winter olympics.  I kept seeing the diamond shaped patterns at the different events, that look very "scrapbooky", and decided to create my own quilt-like collage in Z's book.  I used greens and blues - a piece of just about every piece of paper i could find in my stash.
Aren't they pretty!
 
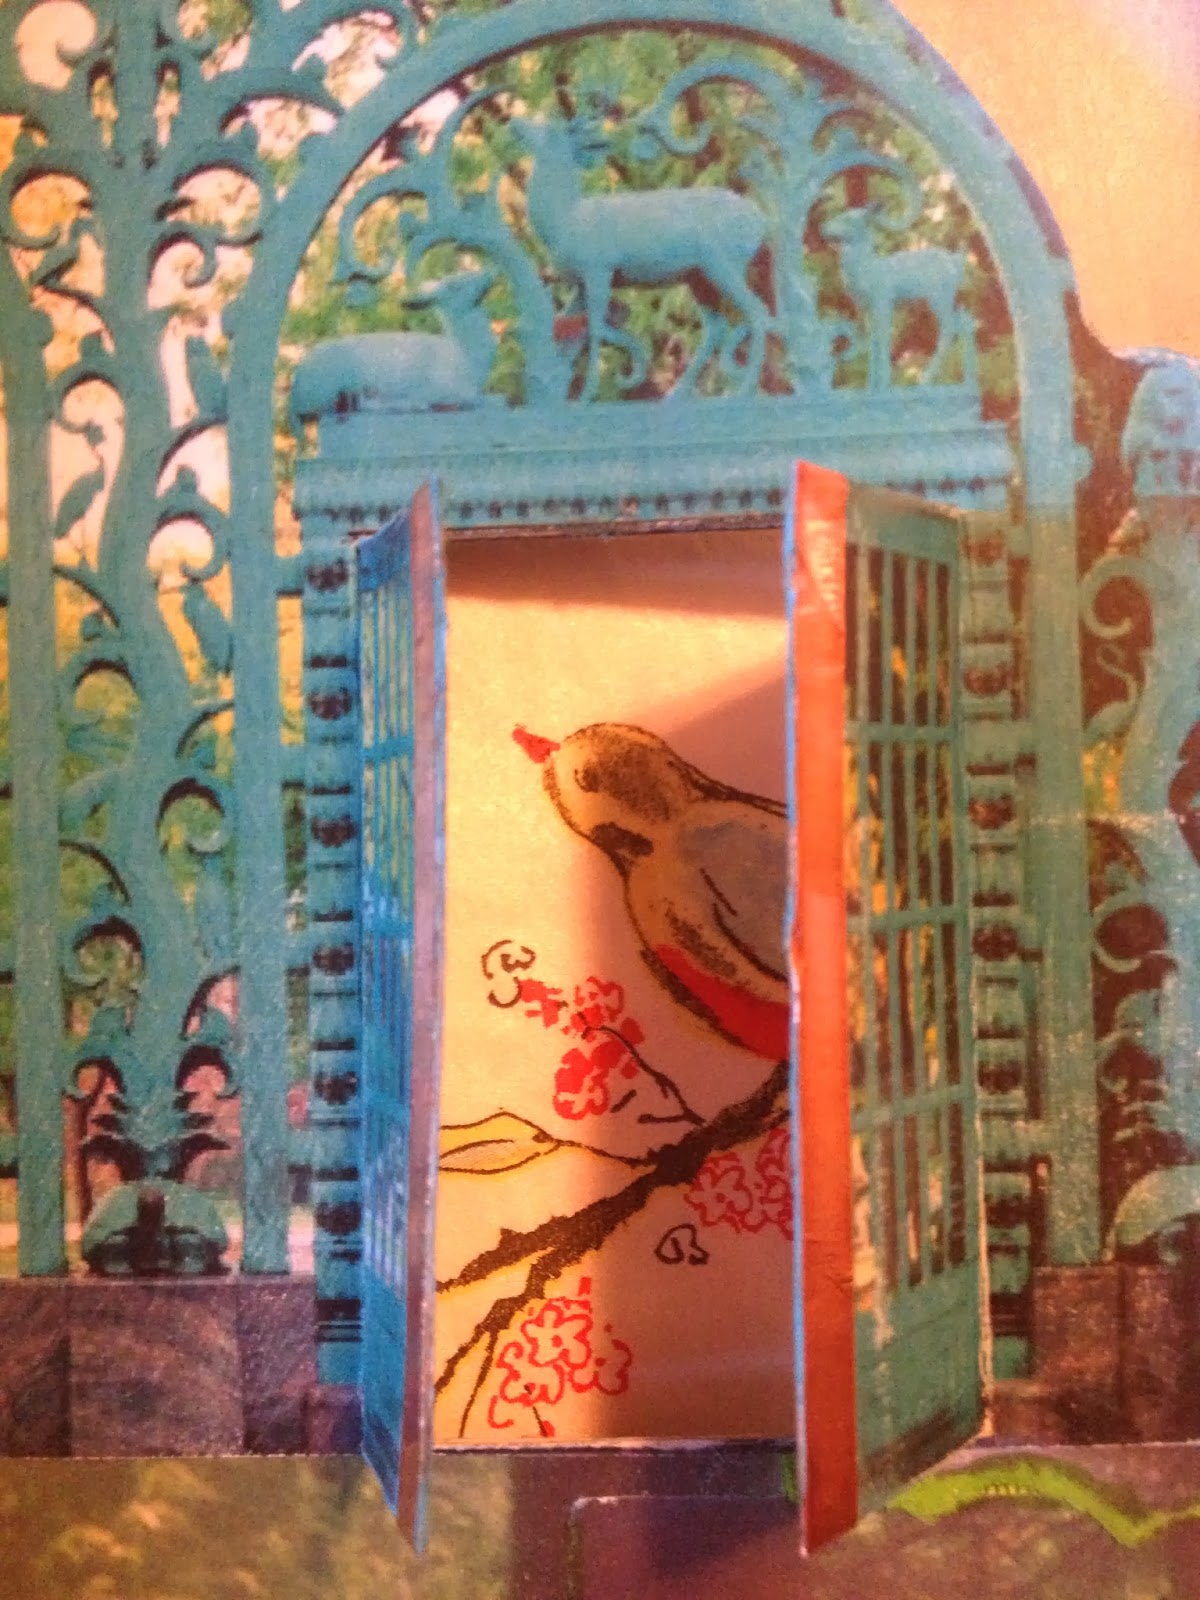
 For my next spread i chose a different shade of green - verdigris.  I found some images online - here an angel statue and a gate, and placed them on a background of a forest.  I added copper trim and the word verdigris with foam stick on letters. 
FYI - wide copper tape can be found in the garden section in a hardware store.  It is sold as "snail tape" used to deter snails from getting into your flower beds.  Those slimy things don't like the chemical reaction with the copper as they slither over it - so avoid it altogether.
 I cut an opening in the gate and trimmed it with narrow copper tape. 
The bird was just for the photograph.
 The gate actually peaks through to the Chateau Frontenac, a magnificent hotel with an oxidized copper roof in Quebec City, Canada.  My friend Z and I are planning a trip there this summer.
 Our sign in pages had some collage done by Z but we were encouraged to add our own touches.  The actual sign in tags are historical versions of colour wheels, slid into green vellum envelopes.
On the back of the tag i added a magazine gal, and my name, and scalloped the edges.
Next month - PURPLE!
See a sneak preview of all the books HERE.

Thursday, February 13, 2014

Paper Hearts

 I decided to make some Valentine cards for my ladies group. 
You know how when you go to Michaels and you have a 40% off coupon
 and you don't know what to buy?  Well i bought a heart shaped paper punch! 
I punched out over a 100 hearts from assorted papers in pinks and blues. 
 I sewed them together on a sewing maching and made 10 strings with 14 hearts each. 
You know, like for the FOURTEENTH of February?
 For the cards i used nice Fabriano water colour paper postcards.
 I splatter painted them with pink spray paint my friend K made from a simple recipe.
 I glued silver hears to the cards using a glue runner.  And no i did not cut those out! - they were purchased at Paper Source.
 I sewed a little loop to the top of each string of hearts, made out of pastel pink vintage seam binding.  Oh you know i love you if i use my vintage seam binding on your card!
 I punched a hole in the top of the card and slipped the loop through. 
That way the string of hearts can be easily removed and hung somewhere
where it can catch the breeze and flitter about. I added a little bit of bling with a pink stone, but kept it pretty simple.  I wrote my sentiment on the back.
Look how cute the hearts look all packed inside the envelope! 
It is like getting a little bundle of love in the mail. 
I used my pretty new address stamp on the envelopes.  Not to get all sappy, but after i lost my husband, it was a big step to order an address stamp with just my name on it.  I chose something pretty with the square shape and the cherry blossom design.
This one got a glitter "stamp" heart, since i hand delivered it.
The rest got one of these.  Thanks USPS for an interesting graphic design.
  I hope the ladies in my grief group, who all lost a close relative this year,
appreciate my little gift of 14 hearts and hugs delivered to their homes.