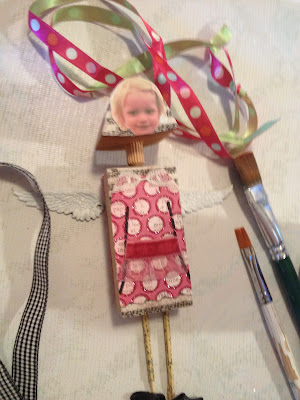
We spent saturday afternoon crafting art dolls out of blocks of wood. Our inspiration came from some similar dolls i saw online on Teresa Mcfayden's whimsical blog HERE. I read that she got the idea from Laura Robberts blog HERE. You can see Laura's video and even sign up for a workshop to learn how to make your own.
You can start with any old wooden blocks or shapes. I had some 1 1/2 inch childs blocks so i used those. I stacked three together using tacky glue and painted them with white gesso. My friend Z gave me some Jenga blocks she bought at a garage sale. Her husband cut some into thirds to make the heads.
The process is kind of varied but for me followed this sequence. Cover the blocks with paper. Add tissue napkins with gell medium to add layers. The faces were cut from vintage photos (copies) and Anthro catalogs. Join head with wire, a dowel, or screw eyes. Add small nails with beads for hair and arms.
Many of the samples i saw online showed faces with underlying or overlying text. Since image transfer is iffy, i decided to try a technique i learned about years ago but never tried until now. Buy a small box of roller papers and the beauty supply store. (you know the kind you use with a home permanent?) Use a blank ink pad, like StazOn and stamp text on the thin paper. Then glue it onto your face with gel medium. It literally disappears!
For this little Jenga doll i used paper beads we made HERE. I always thought they were kind of icky and looked like larvae and never wanted to use them for anything. For for legs on this quirky doll i think they are PERFECT! She isn't quite finished. Still needs more details - hair, hat, arms, whatever. The "you will be taught to fly" quote was cut from a napkin.
This gal has screw eyes to join her head to body and some wire legs wrapped with paper clay. I will paint the clay as soon as it dries completely.
Here is a work in progress from D. Love the tacks used for hair on this expressive face. Like her use of small spools to hold the doll upright. (mine will probably hang on a hook)
D made her block doll reversable - here it has a complely different look and mood.
K's work in progress features many metal elements including a clock face and some wooden spool legs.
K also worked on this architectural creature which will have copper tassels for limbs.
Here is a doll from Z - in progress. She chose the zebra print to echo the edginess of the biker chick face. A studded collar was a perfect addition. The image in the background is our inspiration from Teresa's blog.
Z is also creating a doll with her grandaughter's face. Love the cute dotted sparkly dress with the velvet trim belt.
Another work in progress from K. As you can see just about anything goes and those butterfly wings will be really impressive on this doll!
Another piece by K - where she is using larger wooden blocks and a wooden ball for the head. Love the lace cap contrasted with the metal elements.
As you see just about anything goes and we had so much fun creating our block head dolls!
Another successful play date!


