For a birthday present for a friend i decided to created something pretty and practical. An altered blank sketchbook. This book is about 12" tall and 9" wide and contains nice weight blank pages - full of promise! She can use it to sketch, duh, or as a scrapbook for clippings, recipes, even a photo album.
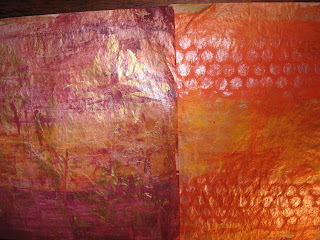
I started with a background of painted deli paper in an orange and teal blend. I originally was not even planning a focal point image of a face, but came across this serene Modigiliani and it was just perfect.
I added a halo of butterflies and even added a feathered and jeweled butterfly with a button in the center.
A few more bits of collage, dictionary paper, pinkie stamps, my favorite florentine pattern paper filled out the bottom nicely.
In the inside cover i carried over the deli paper and a few more collage scraps. A bevy of butterflies complete the page.
Inside the back cover another pice of deli paper and a Modigliani nude - although i covered her up for modesty.
And the back - just plain deli paper. i figured that would be the most durable over time.
Here's another shot of the cover - bad shot with a flash glare spot - but the colours are more intense.
To see more faces with pretty things on their heads - check out my donation to the Marin MOCA altered book show. Details HERE.
The artful world of a mixed media artist and instructor in Northern California.
Showing posts with label deli paper. Show all posts
Monday, May 21, 2012
Altered Sketchbook
Labels:
altered books,
butterlies,
collage,
deli paper,
modigliani,
sketch book
Monday, October 10, 2011
Craft weekend Teaser
Labels:
ATC,
crafts,
deli paper,
halloween,
paper fabric,
play date
Sunday, June 5, 2011
Advanced Altered Book Workshop...a whirlwind!
Yesterday's advanced altered book workshop at Liquid Marin, in San Rafael, CA was such a whirlwind that i forgot to take any pictures! But here is a run down of what we did:
- created a text block in a vintage book
- painted, glazed and stamped three sheets of deli paper
- crinkled, folded and inked three sheets of paper to make cool backgrounds
- used color mists, from outsidethemargins.com to create colorful splatters on vintage paper
- tried out walnut ink to add age and character to book pages
- created a faux licence plate with foam letters and metal duct tape
- created a copper leaf sticker with slug tape
- added metallic touches to a modern art image with gold or silver leaf
- added a tag to a book page with a slit and hidden pocket
- added an image of a door to a page, cut the opening and added mini bradd for door handles
- added an image of a window to a page, and created an opening to see beyond
- cut out an opening for a gate printed on transparency
- cut out a niche in the text block we glued at the start of the class
- created a pop up with a large star gazer lily flower printed on matte photo paper
- created a faux vintage photo from a modern glossy printed picture
Labels:
altered books,
deli paper,
gold leaf,
workshop
Tuesday, November 30, 2010
Deli Paper Blitz
Last night i went on a blitz painting deli paper. As you may know, this is my favorite medium for background paper for altered books. Better to paint and get messy OUTSIDE the book, and glue the lightweight paper into your book. Deli paper glues beautifully. if you don't know, deli paper is thin paper sold in boxes of hundreds or even thousands at places like costco or the grocery outlet. They come in different sizes - these were about 12" square. They are fantastically cheap, about $8 for a thousand sheets! And yes - they are used in deli's to wrap sandwiches. Not to be confused with wax paper. these are just plain and have a matte or dry side and slightly shinier side. You can paint on either.
I created about 30 sheets of paper in about an hour or so. Using three sheets at a time i squirted in rough stripes of acrylic paint and smeared and blended with my favorite expensive art supply tool - old credit cards. Or in my case brand new credit cards as sent from the credit card companies in the mail. As if holding an American Express card with "your name here" would excite me so much that i would instantly sign up for their program. It did excite me, you know, but not in the way they intended, 'cus a crafty girl can never have enough art supplies!I worked in a limited palette of reds, green, white and blues. Creating three more or less the same in one batch. Moving them to another part of the dining room table, and then starting another batch. It does not take long to run out of room. If you have space - you can put newspapers on the floor and lay them out to dry. Or a clothesline would be cool! But i just butted the sheets together - paint to paint, stacked them and hoped they did not stick together. They didn't. But i cannot guarantee that. I am sure it depends altogether on the type of paint and how much. I focus on scraping OFF all the excess paint with the credit card, so they will dry quickly.
After they were mostly dry they each got a final coat of silver metallic paint. Just scraped on with the same credit card. A handy-wipe would have worked even better. But that would have meant a trip back upstairs. If there is one thing i can share with my readers - it is fast and easy tips. Work with what you've got!
So why? Why did i spend an evening painting 30 sheets of deli paper when i could have been watching the 49er's trounce Arizona with my hubbie? Because i created a slew of Christmas cards - and i don't have matching envelopes! You can see a mock up here of what the deli paper will look like when it is folded into an envelope shape around a Christmas card. Cool, eh? I could stamp onto them at this point - or just add the address labels. I could cut them out with an envelope template - or just glue them on and add a decorative sticker. We'll see when i get to that point. I'll be sure to share!
For more exciting deli paper posts click here and here and here and here.
Labels:
acrylic,
credit card,
deli paper,
envelopes,
metallic glaze,
paint
Wednesday, November 11, 2009
Craft-a-pallooza...!
Our first project was deli paper painting. We created dozens on 12" square sheets in random colour combinations using the technique i wrote about HERE. Each sheet has three colours of cheap acrylic paint applied/blended with an old credit card. Then they are glazed with a bit of metallic shimmer. And optionally some were rubber stamped.
Here are three sheets on a pink/orange/mauve colour palette.
Here are some pink and teal with stars and dragon fly stamps.
Here is a cigar box i covered with some of the deli paper. Deli paper glues beautifully just with a glue stick. My niece did one too - but i neglected get a picture.
Here is the inside of the cigar box. I left the gold/green/red label exposed because it coordinated beautifully (quite by accident) with the deli paper. Even the taped borders on the original box looked cool - so i left them uncovered as well.
Our next project was these glitter bird cards from a Martha Stewart craft kit i picked up at Big Lots for two bucks! Not sure why it was there in a bargain pile - they were one of the best designed and fool proof kits i have ever used. Each kit comes with 8 blank cards and 8 bird stickers, and 5 vials of glitter. Erica and i each made three birds - so easy, you just peel off a section of the bird - sprinkle on the glitter, and rub off the excess with your finger. Put the un-stuck glitter back in the vial. Peel another section, apply a new colour of glitter, etc etc.
Our next project was these glitter bird cards from a Martha Stewart craft kit i picked up at Big Lots for two bucks! Not sure why it was there in a bargain pile - they were one of the best designed and fool proof kits i have ever used. Each kit comes with 8 blank cards and 8 bird stickers, and 5 vials of glitter. Erica and i each made three birds - so easy, you just peel off a section of the bird - sprinkle on the glitter, and rub off the excess with your finger. Put the un-stuck glitter back in the vial. Peel another section, apply a new colour of glitter, etc etc.Then you peel of the backing of the bird and stick it on the card. There is even a narrow border of sticker on the card to apply glitter for a border.
Our next project was to use all those beautiful deli papers as background for a Papaya-style collage. I did a workshop a few months ago with my altered book group using this same technique - you can read about it and see some great pics HERE and HERE. The funny thing was - i could not find my samples to show my sister and niece. So they created these amazing collages completely randomly. Well, with my guidance of course - but they just went for it.
Our next project was to use all those beautiful deli papers as background for a Papaya-style collage. I did a workshop a few months ago with my altered book group using this same technique - you can read about it and see some great pics HERE and HERE. The funny thing was - i could not find my samples to show my sister and niece. So they created these amazing collages completely randomly. Well, with my guidance of course - but they just went for it.This one is mine - i used a deli paper background, an image cut out of Vogue magazine, and applied stickers using the recipe i developed: radiating stripes from the head, flowers and butterflies, and hoopy earrings drawn on with a sharpie.
Here is Donna's. She was really nervous about placement - qranted her "head" was more challenging because of the hair. But she created a lovely collage with a floral headband, and floral necklace punctuated with butterflies. She added the word BEAUTY using a stencil i created. Her deli paper is so pretty - looks like water, almost like her image is a mermaid floating out of a serene lagoon. Definitely a Tahitian vibe.
And finally here is Erica's - WOW. Did i mention she is 13? She had the most stunning collage of the three of us. First her deli paper and a nice contrast of green to blue. Then she chose a striking face and off set it on the page. Then her choice of large pink flowers and bright blue butterflies created a fantastic headdress for this gal. And she did some nice hoop-y earrings and swirls. I hope they display their Papaya style collage proudly back home in Calgary, and think fondly of their crafting vacation in sunny California all cold winter long.
Here is Donna's. She was really nervous about placement - qranted her "head" was more challenging because of the hair. But she created a lovely collage with a floral headband, and floral necklace punctuated with butterflies. She added the word BEAUTY using a stencil i created. Her deli paper is so pretty - looks like water, almost like her image is a mermaid floating out of a serene lagoon. Definitely a Tahitian vibe.
And finally here is Erica's - WOW. Did i mention she is 13? She had the most stunning collage of the three of us. First her deli paper and a nice contrast of green to blue. Then she chose a striking face and off set it on the page. Then her choice of large pink flowers and bright blue butterflies created a fantastic headdress for this gal. And she did some nice hoop-y earrings and swirls. I hope they display their Papaya style collage proudly back home in Calgary, and think fondly of their crafting vacation in sunny California all cold winter long.
Labels:
cards,
cigar box,
craftapalloza,
deli paper,
glitter,
papaya
Sunday, March 29, 2009
It's Greek and Roman to Me
I chose Achilles because of my own serious ankle injury a few years ago. I too feel vulnerable there now. I like how all the various papers come together.
As always, there is a sign in page when you are participating in an altered book round robin. I had my friend Z over this week to help me organize the remaining papers that hadn't been filed when i cleaned out my craft room.
Labels:
altered books,
deli paper,
greek,
romance,
themes
Saturday, February 14, 2009
Deli paper note cards
I just cut out the paper into 3 x 4 1/2 pieces and glued them onto blank notecards with a glue stick. Deli paper glues beautifully.
Labels:
cards,
deli paper,
thank you
Saturday, February 7, 2009
More Deli paper
Labels:
colour,
deli paper,
paint,
painting,
stamping
Monday, February 2, 2009
Deli Paper Play Date
To get started you need deli paper - usually sold at Smart and Final or Costco. About 1000 sheets for less than $10.
Labels:
art,
deli paper,
paint
Subscribe to:
Posts (Atom)