Showing posts with label cathe holden. Show all posts

Monday, July 13, 2015

Mason Jar Luminary

I had the pleasure of attending another one of Cathe Holden's workshops 
at her inspiration- filled barn studio in Petaluma, CA.  
The project was a mason jar luminary with a paper house, mossy base, vintage collage elements and a wire and pearl bird's nest.
Here are the class samples.
And some samples of the bird's nests.  SOO cute!
Here is a picture of our kits - Cathe is so precise and generous with the materials - everything we need is included - you don't have to bring so much as a pair of scissors.  
As a graphic designer, she designed some the collage elements to print on 
vintage sticker paper!
Here is the house template all cut out.  I learned how to make these cute houses at Cathe's house luminary workshop last Christmas, you can see HERE.
Here are my bird's nests.  
I found them a little bit messy, but they are so easy to make and look adorable!
Here's the lady herself!
Here is my luminary project completed... from all sides:
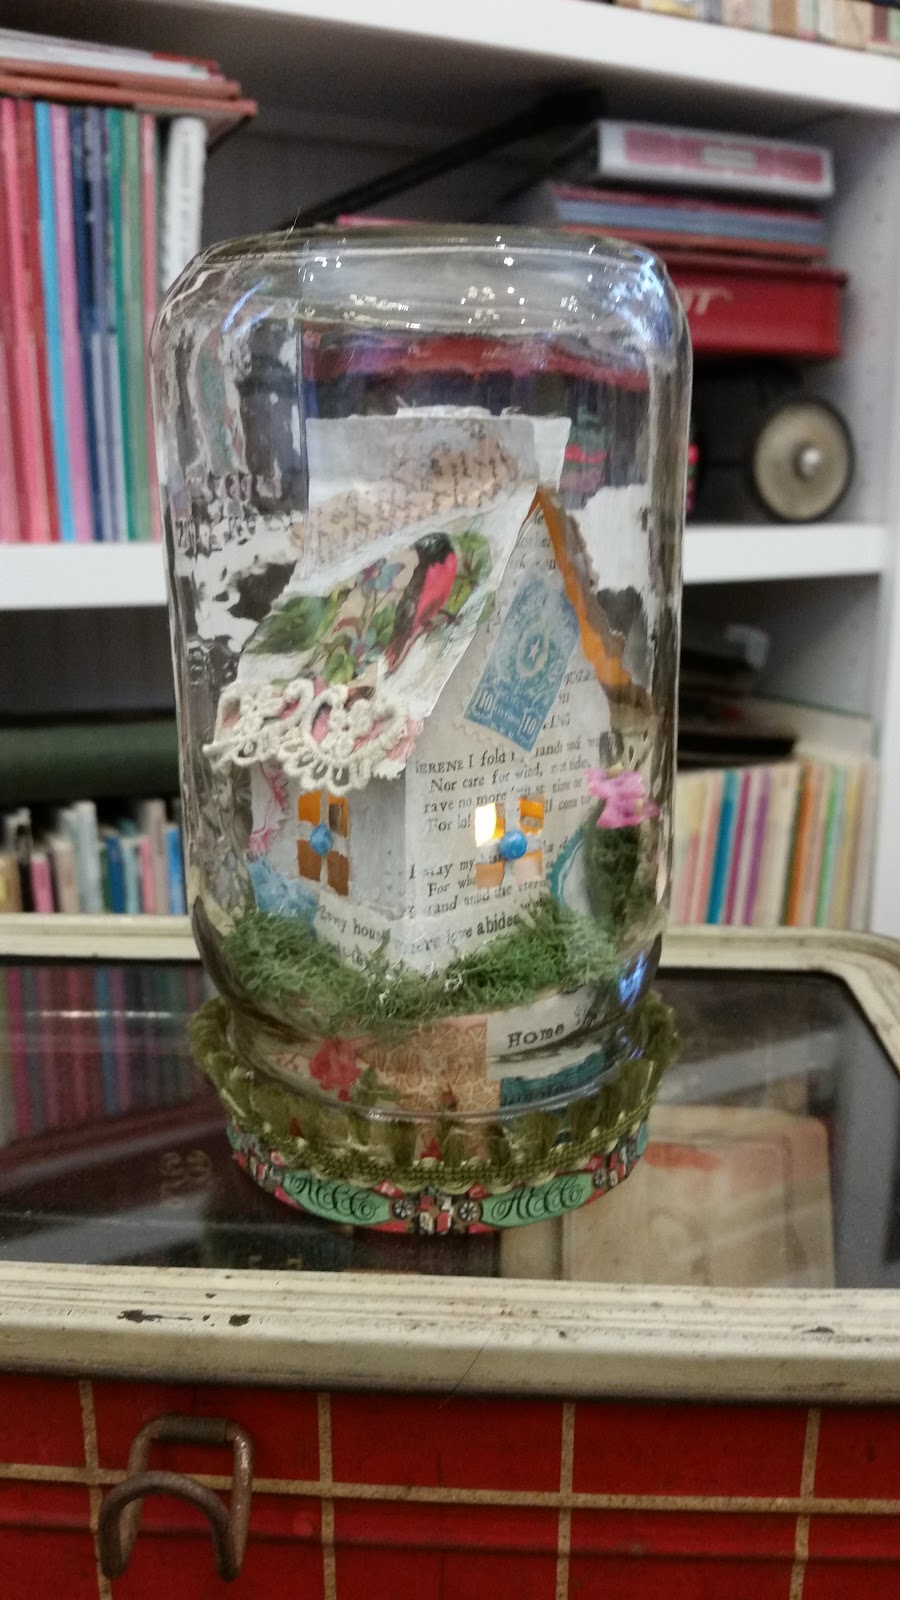


Here are some of the other student's work in progress:


Here is a shot of the whole glass gleefully holding up their creations:
Thanks Cathe for another fun filled visit to your magical studio!

Monday, November 24, 2014

Paper House Luminaries Workshop

I had the pleasure of taking another workshop with the imitable Cathe Holden at her Inspired Barn in Petaluma, CA.  We each made three adorable paper houses, with a flickering tea light inside they do this:
We did pretty christmas theme - but you can imagine how cool they could be for halloween!
 Cathe always makes us feel special, and this class was no exception.  We were given all the supplies and tools necessary to create the house - including a full printed guide.
Luminarie Mobile by Cathe Holden
 Here is Cathe's sample - 6 little houses used to create a delightful mobile. when attached to a golden crown.
 From her instruction guide - here are some ideas for where to place the bling.
 Here are all the components all laid out - including glitter and mica flakes to create a snowy effect.
 Did i mention bling?  Cathe arranged for each of us to get a sampling of gorgeous rhinestone and sparkly goodies from the Blumenthal Lansing Button company.  they were all so pretty - it was hard to choose which ones to use!
 Cathe printed the layout for the house on the back of these card stock images of text and vintage printing from the back's of cabinet cards.
 So we simply had to cut and fold!  her patented technique (i have no idea if it patented - it should be!) made it super easy to assemble and glue these houses together.
 Once we had cut out the little windows it was time to add the adorments.  i brought a few things from home.  a couple of birds (of course) some aqua blue trims (of course) and even a little bunny charm which i coated with glitter.
 The rooflines were run through Cathe's vintage pinking machine - to create that lovely scalloped edge.
 The final touch was to add some ribbons and lace to the curtain hooks to allow for hanging.  I even applied glitter and snow to the hooks!
 With the flicker battery operated candles inside they really do come to life.
 Here are the houses my friend A made - so sweet.
House Assemblage by Cathe Holden
Cathe had many ideas for the little houses, including this lovely country scene using a book cover.  Please check out Cathe's website and blog.  She is super generous with her time and talents and has many freebies and ideas to share at just something i made.
Thanks Cathe!

Monday, September 22, 2014

Bottle Brush Trees Workshop

 I took another fun workshop from Cathe Holden at her magical studio the Inspired Barn. 
She showed us how to make bottle brush trees.  from scratch!
 You start with some rope.
Then you cut a section and take it completely apart down to the individual fibers.
I love how Cathe sets up each of our work spaces with all the necessary tools. Plus treats! 
 Well - here is how the magic happens.  You bundle your fibers in a folded wire - and use a drill to spin it to create a bottle brush.  Then you trim it to a tree shape.
 Then you dye the tree - we used Rit dye.  lots of colour choices!
 Here you can see a few drying on paper towels.
Here are a few a fellow classmate did.
Go to this link to see Cathe's full tutorial HERE.
 
Thanks Cathe for another fun evening. 
Now I must think about some cute projects for winter
which incorporate my pretty little trees...!

Friday, August 1, 2014

Washi Tape Flowers with Cathe Holden

 I attended a "meet up" workshop at Cathe Holden's Inspired Barn studio in Petaluma, CA. I created 9 flowers, enough for three little corsages.
 She showed the group of ladies gathered in her magnificent wonderland of a studio how to create the individual petals and leaves with wire and washi tape.  If you are not familiar, washi tape is colourful paper tape, originally from japan - but now available all over.  You can buy it by the roll or in packs.
She gave us each a tiny little tin bucket to carry our flowers home.  It is this attention to detail that i love!
 The supplies are simple - an assortment of tapes, some wire, some curling tools and florist tape.
 Without giving away all her secrets - you can see here the beginnings of the petals.
 It helps if you have a killer assortment of floral stamens.
 And a dozen or more washi tapes....  this is what it is all about people!  
as i always say - it is simply more more fun to play with someone else's Barbies 
(remember back when you were 7?).  '
And Cathe has the best Barbies in Northern California!
Here are some of the other student's flowers:


The variety of patterns and colours is so inspiring.
Here are some that Cathe made to show us how:


To learn more about Cathe's workshops and Inspired Barn click HERE.
To see the last workshop i took with Cathe click HERE.