Sunday, June 27, 2010

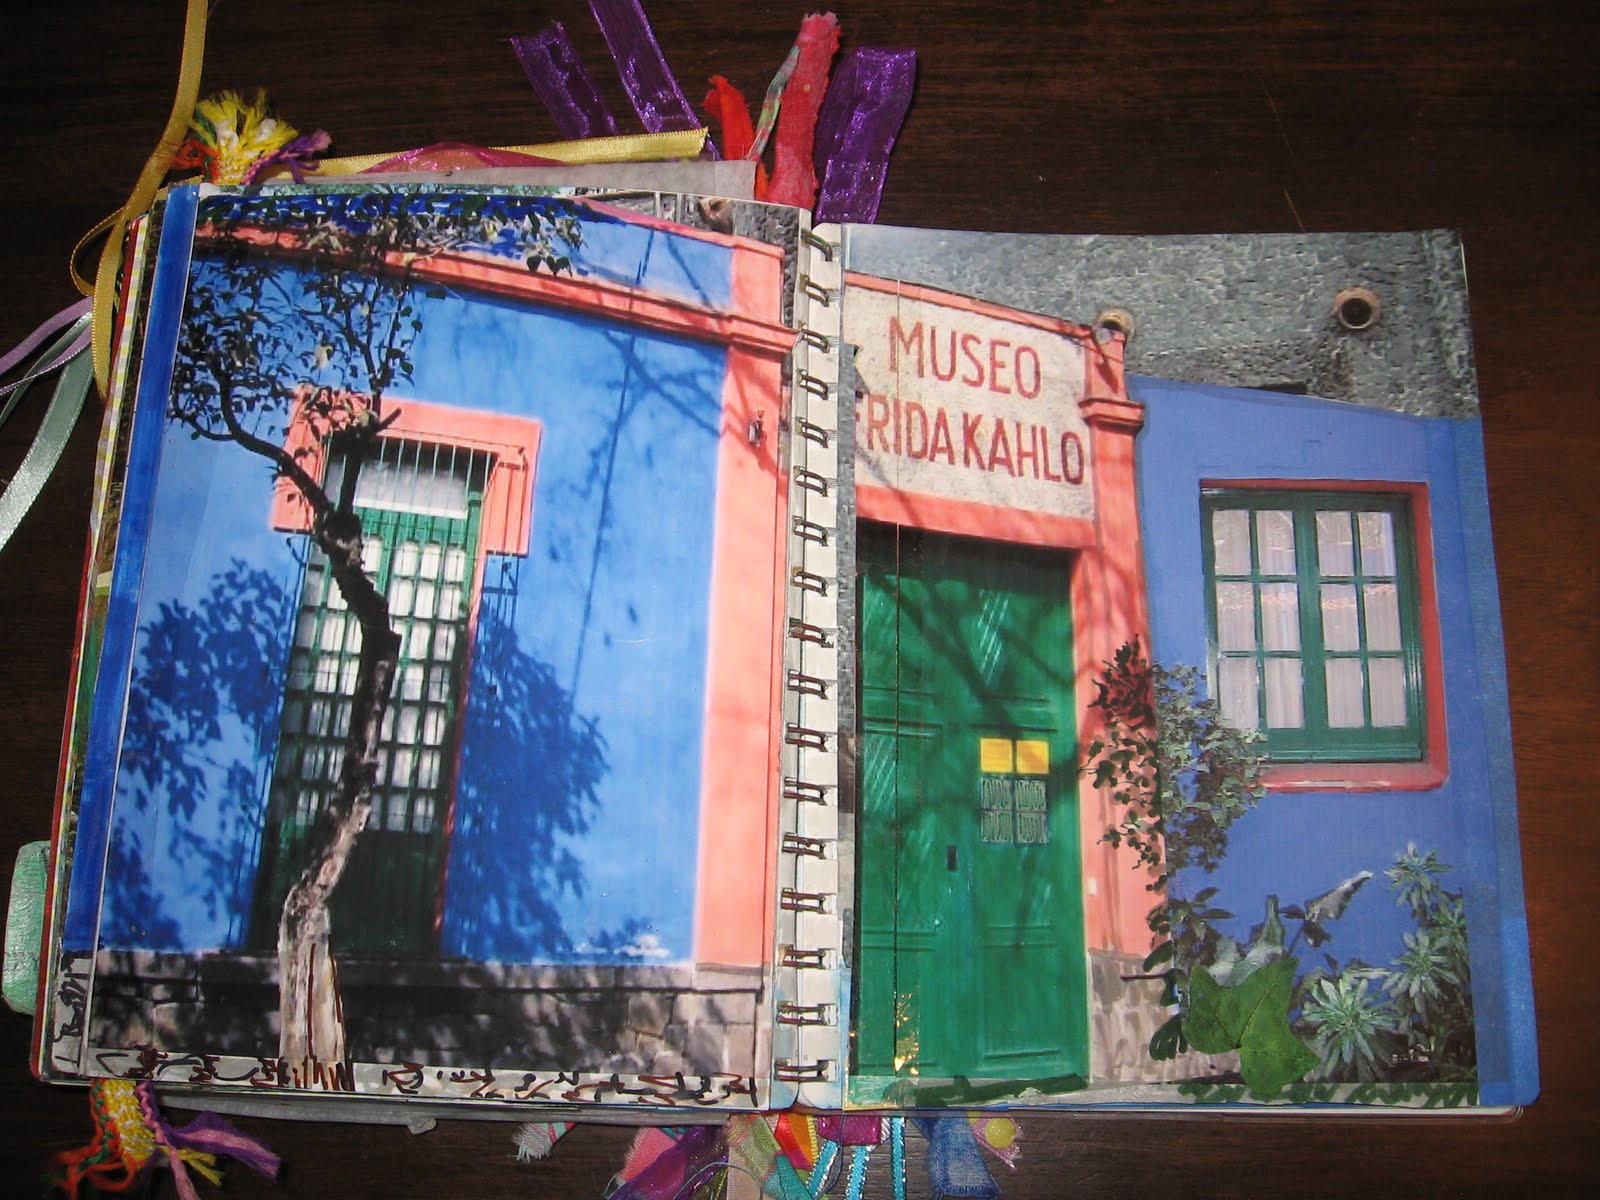
Frida Kahlo Altered Book

Six months ago i started a calendar altered book round robin with 5 artistic friends.  Today i finished working in the 6th book - a vibrant colourful and chunky Friday Kahlo inspired journal.  I had the book for the month of June.  Tomorrow i'll mail it to Aileen and any day now i'll get my book back from Terrie!  This is the first time I've done a calender with 6 instead of 12 people - so it is unusual in the fact that we work on our own book twice - January and July.
The page above had the illustration on the right - a bride who is afraid to look at life open (direct translation!)  I decided to create a random collage focusing on yellow and pink, which featured prominently in the original painting.  The lady on the left was cut out of a Spanish womens magazine from the 50's.  I chose it because the dotted dress somewhat echoed the watermelon seeds.
This spread had a somewhat dour portrait on the left with geometric buildings in the background. I created the simple collage on the left using the colours found in the original artwork.  The citrine mulberry paper was in the kit of "goodies" that Aileen included with her book.  That's where i found the square stamped face that i added to the woman. I think it helps reinforce the rectangles of colour on the right.  And the bird - well - you know me and birds!

The next spread had the Frida Kahlo self portrait with monkeys. I used a page from the old Spanish magazine on the right that illustrated various necklines.  I added the words "monkey see monkey do" on the left to contrast the message on the right - to "express yourself individually"! Some vibrant parrots add a bit of splash. 

The next spread turned into a bit of a craft project.  I created a 3-D Frida Kahlo museum!
Here it is looking flat.

I created the interior courtyard of the museum - which used to be Frida's house, on the outskirts of Mexico City. I pasted together several pictures of the pebble walls with their glorious blue alcoves.  In the center i created a pool - and FINALLY used these handpainted tile stickers i have been saving for some reason!
Don't look too closely at the courtyard - the perspective is somewhat off - but the overall effect is fun!

Here it is all folded open.

Here is the cover of Aileen's book - she used dozens of assorted coloured and patterned ribbons to add fun to the binding.

This is the sign in page.  Aileen created tags for each of us - that's mine decorated with some elements from the goody bag she included with the calendar.  You can see her signature colourful style.  Check out more at Outside the Margins!

Saturday, June 19, 2010

heart card

We are going to a 50th wedding anniversary party this evening for an associate of my husbands, i don't know very well.  I wanted to make a card and tried a bunch of things with gold vellum and metallic papers and even hand made paper with dried leaves pressed into it. I hated everything.  So instead i made this simple black folded card - about 6 inches square.
I cut out a heart form scrap paper and placed it in the center of the card.  I applied a strip of glue in the heart shape on the card, using the paper as a guide.  Then i stuck the buttons in the glue.
Simple and sweet!

Monday, June 7, 2010

Floral Tributes... Mixed Media Monday

The completion of the latest calender in our 2010 round robin altered book swap just so happens to coincide with the theme for today's Mixed Media Monday challenge: Floral Tributes.
The theme of Shelley's calendar is Bloom.  And it certainly does just that - in fact it pours forth an endless display of colour and texture and artful collage. The page above was created using a Cavallini paper with postcards and birds.  It had flowers too - but they were not strong enough - so i cut some floral sprays out of a different paper and glued them on.  I dry brushed some gesso to blend the images.  A few red french postage stamps add some extra colour.  I added the letters M-A-Y - since i had the book for the month of May.  (yes i am late to mail - it will go out tomorrow!)
For my second spread i pulled 4 images of peonies from an Asian art journal.  I spliced them together to fill the tall pages of Shelley's calendar.  When i was joining them together - i left slits so that i could insert two vintage images - they have journaling on the back.  Some chinese text and butterflies complete this page.


For my third spread i wanted to use this vibrant wrapping paper with yellow, blue and pink roses. it doesn't quite show, but it was a 24" by 36" piece of paper - and it was torn up and all scrunched up to fit - with a ton of gel medium to adhere. Each page in the journal had a quote on the lower right hand corner.  So in this case i left it visible to read.  Then i added my own "poetry" - the little pink words dot the page.  I took a flower book and cut out phrases to create the poem, which neither rhymes nor is particularly pretty or profound - but it suits the page!


This spread was fun - i used a pretty square napkin as a base - overlapping a bit in the middle. I added two lovely ladies in floral outfits - courtesy of the Anthropologie catalog. I covered their legs with scraps from another floral napkin in similar colours.  Then added some floral sprays to their heads.  The words are cut from a garden book and relate to attracting birds to your garden.
This fifth spread was almost completely copied from a journal image i saw online.  I was struck by the simplicity and clever use of ephemera cut into unrelated shapes - like the flower pot and leaves. I added journaling about our trip to San Francisco over Memorial Day weekend.

This is a glimpse of the pages before they were collaged upon. The book was a nice size - about 12 inches tall.
Here is Shelley's beautiful cover.  She is a master of adding depth and texture - just using paper.  In fact she requested that we keep our pages flat - ie no chunky embellishments.
Here is one the "chapters" she created - one for each season. It was a joy to create in Shelley's beautiful Blooming calendar.  Now i absolutely must get it packed up and in the mail to Aileen.  I have her Frida Kahlo book to work on next - then my OWN calendar comes home to me - for our mid-year break.

Wednesday, June 2, 2010

Thank You Notes...

We spent Memorial Day weekend in the San Francisco Bay area visiting our dear friends.  We wanted to send special thank you notes to our hosts for the weekend and another couple who threw us a lovely luncheon on Saturday.  Both these couples are very interested in flowers and trees and nature and hiking and the outdoors in general.  So that somewhat dictated the theme for the cards!

For both cards i used letter press prints from a vintage quest book.  The illustrations were done by Gwen Frostic. You can see her lovely designs on the website.  I picked up TWO of these books at an estate sale a few years ago. I paired the two illustrations with patterned card stock and made simple folded cards. I added some foreign stamps with flowers images to the front for a bit of colour and well - if you are going to send hand made cards - you want there to be a bit of "hand-made-ness" to them.


Inside i will attach a plain piece of writing paper where we can express our gratitude for the lovely meals and wine and fabulous desserts.  yum.  So i stamped "Gratitude" on the front of the folded paper.  Well, that and because i cannot find one of at least three stamps i own that say "thank you".
Thank you all for a wonderful long weekend.  Hope yours was just as special....!

Sunday, May 16, 2010

More Jewelry Making


A little while ago i had a play date with some of my co-workers.  We spent the day making jewelry. Well we enjoyed ourselves so much we had a repeat event this past Saturday.  We met at my house around noon and had a lovely pot luck luncheon by the pool.
Then we got started. I worked on this piece.  I picked up the vintage rose pin at the Rose Bowl Flea market last year.  I wanted to make an asymmetrical necklace using the pin as the center piece. I had some rosary beads i wanted to incorporate - but the chain was too gold for the gunmetal of the pin.  So i made the rosary MYSELF - yeah!!
I used assorted glass, silver and vintage rhinestones - using the wire wrapping technique.
This is a crystal from a chandelier!

Next i worked on this pretty pink necklace.  I used the sterling silver wire i was "saving" until i was good enough at wire wrapping - since it is pricey.  Not sure i like it = with the right outfit it will be nice.

I used a bone carved rose as a the focal point and some vintage bits from my button box.
I had picked up some fresh water pearls in soft hues - but they didn't work with the other pink necklace - so i made this one.  More delicate - with sterling silver chain.
I love the organic softness.
I continued making necklaces on Sunday and made this one using glass beads, gunmetal chain from Michael's and more wire wrapping.
I had actually started this one about 5 years ago!  I had the glass leaves and started to make a bracelet.  I turned it into this necklace.


Here's everything i made - including the copper flower on the left i somehow forgot to photograph.
Oh - but then before i put everything away i made this with assorted green and orangey red glass beads and antique gold circle chain from Michaels.
I get into a rhythm making wire wrapped clusters and just connect them as i go.
Oh yeah - i also made a bracelet.  This was assembled with elastic thread, pretty little beads and some shell buttons.

Very soft and comfy on the wrist.
Here are pictures of the things that my friends made:


What a great way to spend the weekend.  To top it off, Saturday night we went to see a contemporary gospel choir performance. One of my co-workers is in the group.  They were fantastic!

Monday, May 3, 2010

Circus Circus - April Altered Calendar

Here are the pages i just completed in Dorothy's colourful Circus themed calendar. Each spread had a image or illustration related to circus.  Our task was to embellish the pages to create a lovely circus themesdcollage.  The first spread above had the illustration on the right.  The picture on the left came from a recent Anthropologie catalog!  Yeah - how cool is that?  It matched almost PERFECTLY.  Of course Anthro is not selling beaded and feathered costumes - i made those.  Paper dolls for grown ups!
This spread had the vintage image on the left of a daredevil tightrope walker. I went with the  black and white theme and added a similar image i found online.  I cut the edges to look like a photograph with deco edge scissors. I created a flap with silver metallic tape.  I did some journaling under the flap and added the silver heart with the phrase I "heart" danger. Some white gesso scraped on with a credit card and some silver ink spatters finish off the spread.
I had no idea what to do with this spread - which had an x-ray of a sword swallower. How creepy!  Then i happened to see the postcard on the left, sitting on my card stand in my craft room. It is an advertisement for Cirque Berzerk.  Not sure where i picked it up - but it was perfect!  I added some striped paper and tape and made another little flap.  I finished it off with a skull and crossbones silver charm.
Ok - back to the happy circus of our youth! Page on the left was in the book - page on the left - more collage courtesy of Anthropologie. I added some simple tape stripes to tie them together. Seriously.  if you don't already, sign up to get their catalogs.  Every month they are filled with luscious images.  You never know when you can use them in an altered book!
This spread was all me.  There was a circus poster of a lion tamer - but i could not figure out what to do.  Searched on-line and found this fun image instead! These lovely ladies are holding big cones of pink cotton candy. Cotton balls i dyed pink with Color Mists from Outside the Margins.  Coincidently Aileen is participating in this round robin.  Please check out her blog to see some of the colour packed pages she has done already.  Can't wait to see what she does with this book!
And finally here is the really cool sign in page Dorothy created for each artist to leave their name and a final bit of collage. What a fun theme and a joy to work in this book!